Please note: This tutorial was sponsored by Rio Grande.
Whether you are a beginner or have been creating jewelry for awhile, a bezel set ring is a wonderful project that will allow you to practice a variety of skill sets. I've put this tutorial together to walk you through creating this ring which features a gorgeous American Mined™ BlueBird Turquoise from Rio Grande. This particular project also incorporates gallery wire instead of traditional bezel wire and decorative wire for the ring shank. So before we get started these are the materials you will need for this project, and there are also recommended tools linked throughout the article!
Materials
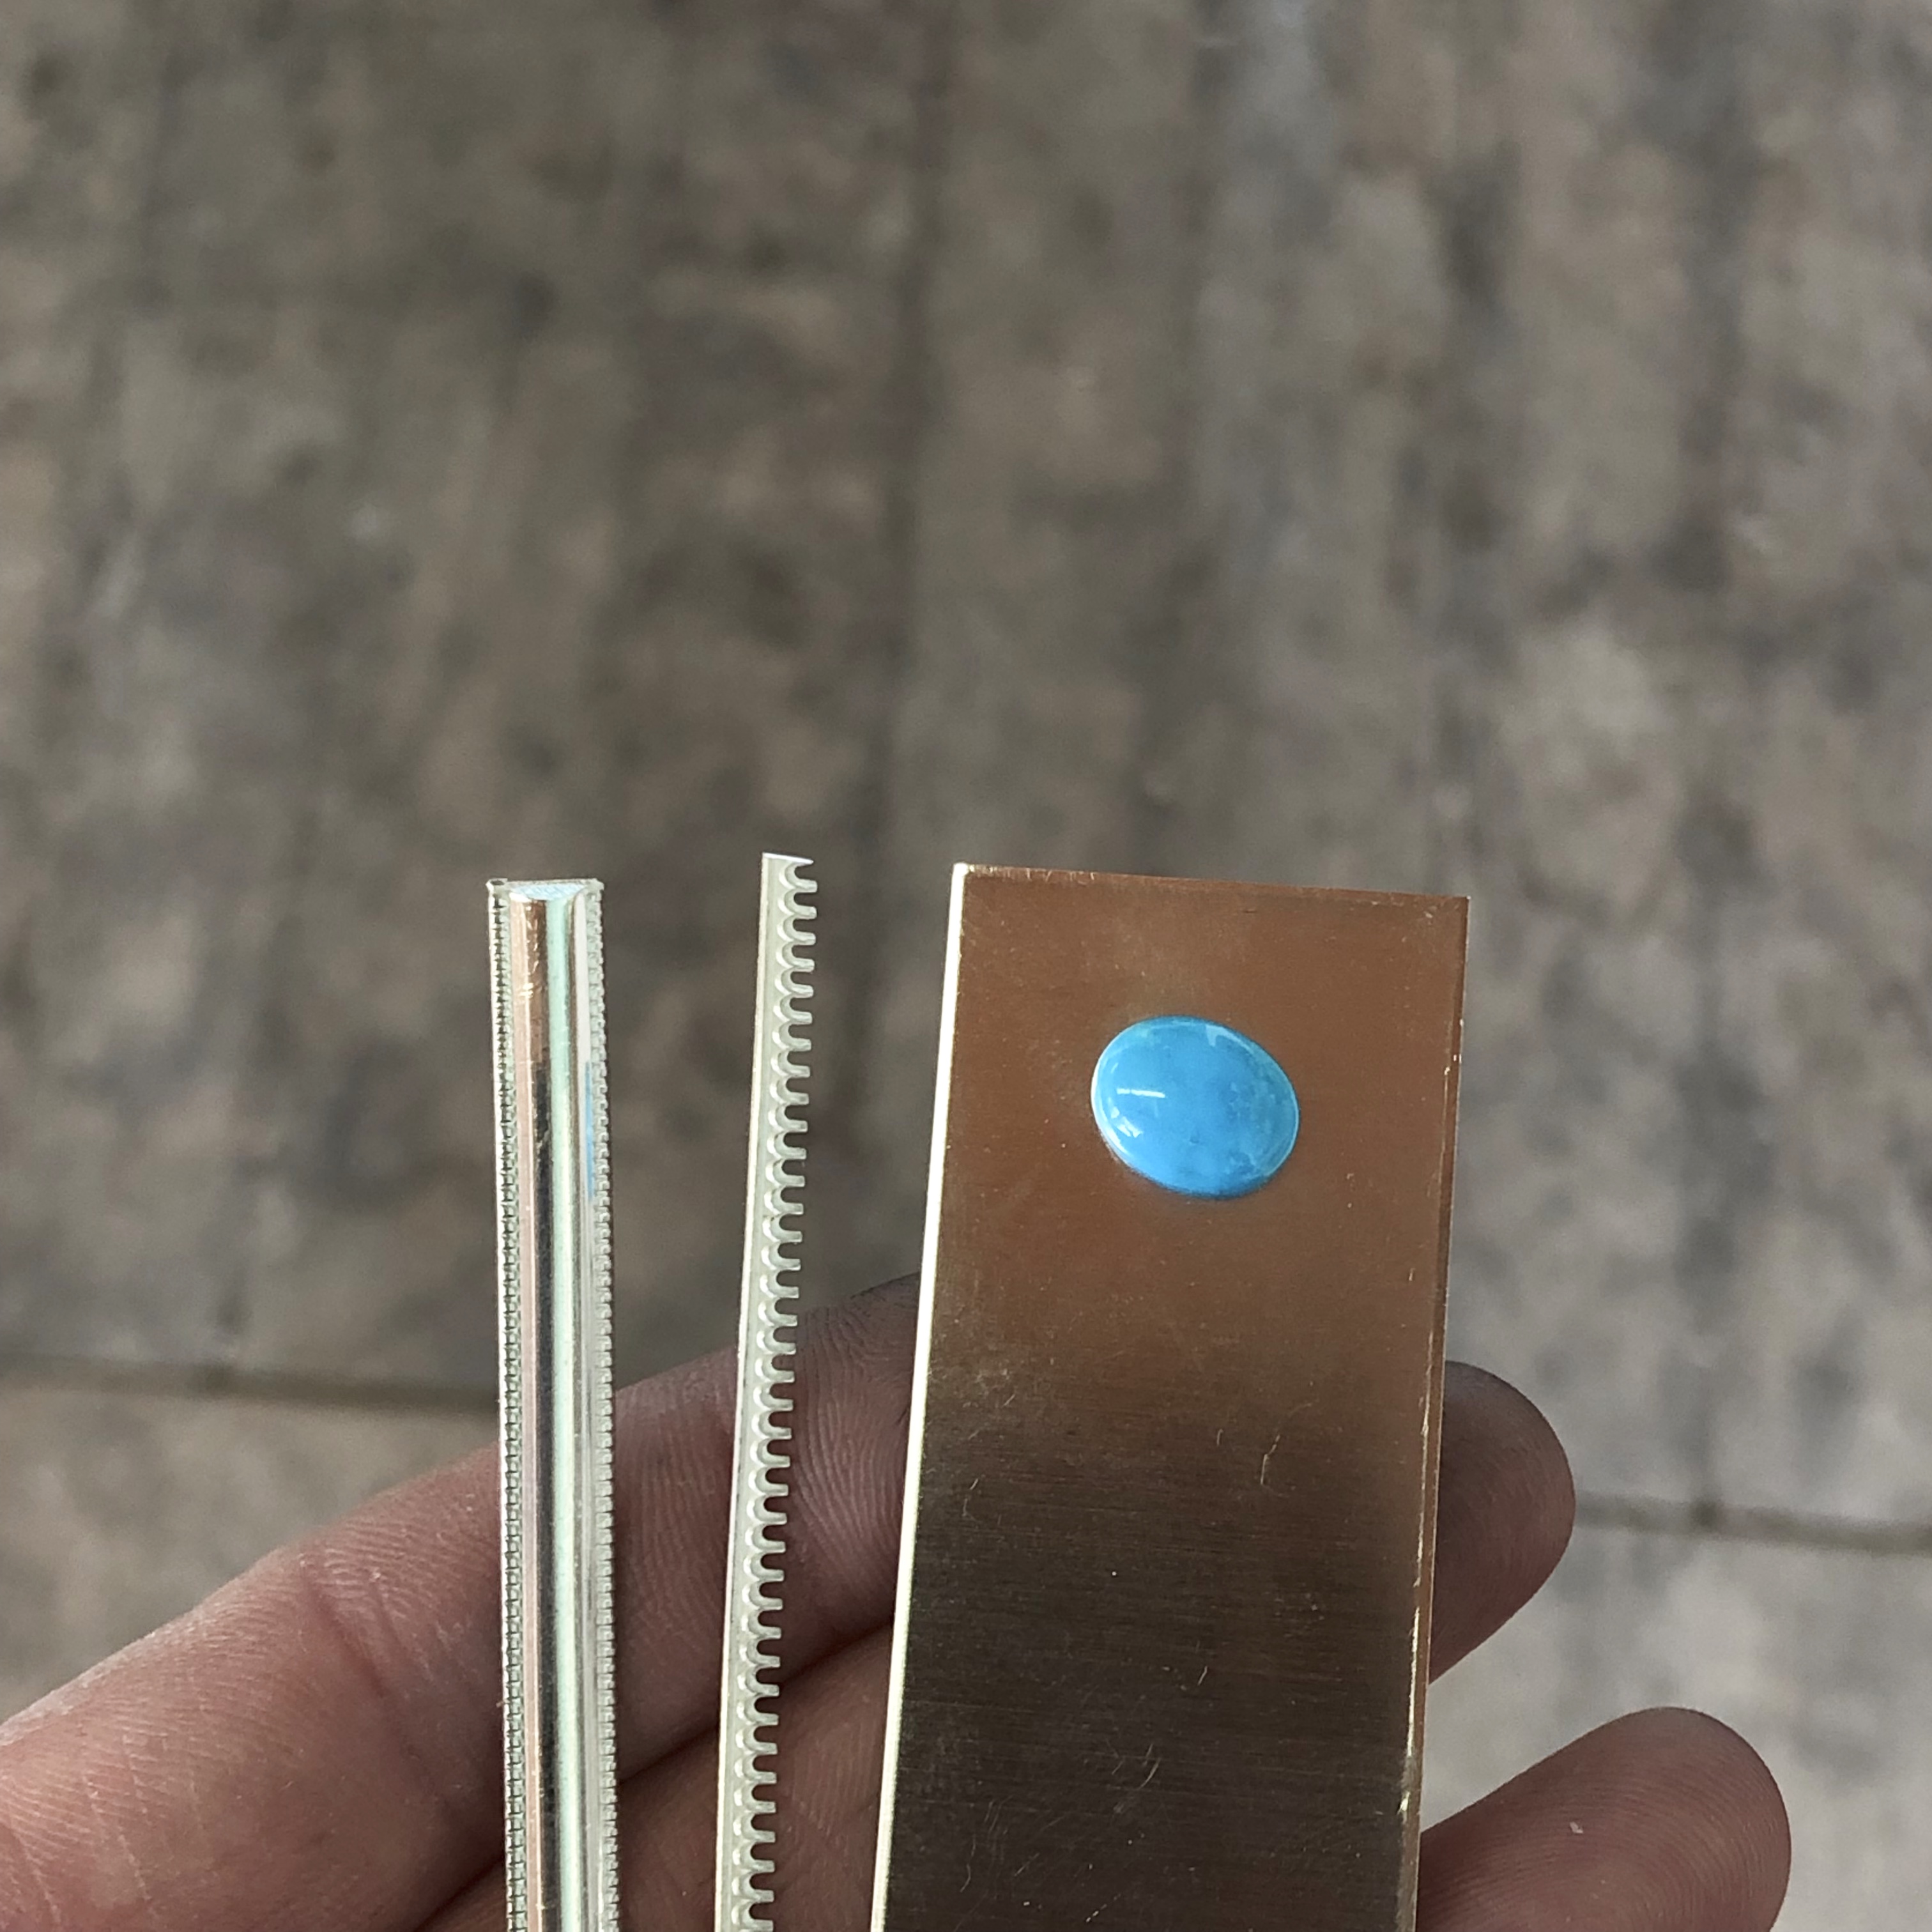
- American Mined™ BlueBird Turquoise™ 10 x 8mm Oval Cabochon (Item #88871)
-
Sterling Silver "Scallop" Gallery Wire (Item #103273) I recommend ordering more than you need in case you need to remake the bezel for any reason. Ordering a 6" piece will be enough for you to make a mistake.
- Sterling Silver Patterned Wire, Dead Soft (Item #104204) We will be using a coil method to make the ring so ordering a 6" or longer piece will work well for this technique. If you'd like to be more approximate you can use this standard formula: (A [inside diameter of your desired ring size] + B [metal thickness]) X Pi (3.14) = blank length (+ .5mm if over 4mm wide, which this wire is). Again even if you use this method, it can be nice to have extra wire on hand in case a mistake is made, or if you fall in love with the wire and want to make another project with it!
- Sterling Silver 6" Sheet, 18-Ga., Dead Soft (Item #100118) The most affordable option is to purchase a single piece of 6" X 1" in the 18g. I recommend 18g because you will have left over metal and 18g is so versatile, but if you already have metal on hand 20g could definitely be used!
Step 1: ANNEAL YOUR WIRES

You will want to anneal your gallery wire and decorative wire with a big fluffy flame. If you are a beginner, try marking the wire with sharpie prior to flux, once you see the sharpie disappear you are annealed! Take special care with the gallery wire it melts very easily!
Step 2: MEASURE, CUT AND FORM YOUR BEZEL WIRE

For this particular stone I found the quickest method for figuring out how much bezel wire I needed was to take a strip of paper, wrap it around and mark with a sharpie. Then I lay it flat and marked the gallery wire to the desired length. I always air on the side of making it slightly longer by 1mm (easy to trim smaller, must be scrapped if too short) especially since the paper is thinner than the bezel wire and this technique is giving me a good estimation not an approximate length. I took a photo of it wrapped so you can see that the method works well. If you already have bezel wire on hand, you can simply wrap around the stone, mark with the sharpie and cut.

One important consideration with gallery wire is you want to try and match the pattern so that the area with your solder seam doesn't stand out. For this fit I trimmed away (with bench shears) and filed until the bezel fit the stone but also had spacing that matched the wire's pattern.
Step 3: SOLDER AND SAND YOUR BEZEL

To solder my bezel closed I used my hard charcoal block, fluxed the gallery wire and placed a small piece of hard solder on the inside of the bezel. With my flame I carefully heated from the outside to draw the solder into the seam. You want to make sure you don't use too much solder with gallery wire because excess will flow into the details and there isn't much you can do about that, so less is always more. Once I check I have a good fit I sand the bottom of my bezel using a figure eight motion on a steel block.
Step 4: FORMING YOUR RING SHANK

The quickest and easiest method for making a ring with wire is to form a coil around a ring mandrel (I used a stepped mandrel, but that is not necessary a regular mandrel works great!) Always form around a smaller ring size initially because the coil will always expand a bit. I use my rawhide mallet to gently tap the coil and the Maun urethane lined parallel pliers (Item #111108 )are great for pulling on the end of the coil to tighten. You can always anneal again if you need to. Once you have the desired size you can saw through your coil. Some people find taping the coil helps them saw through it without everything seperating. I ended up with two rings which is nice. The urethane pliers now help me close my ring without marking the metal. If I get it closed but its still a little uneven, I can carefully saw through the seam to get the fit nice and even.

Hold your ring up to a light, and "if you see light, it isn't right!" In order to get a beautiful solder seam you will want to make sure the seam looks as tight as possible. Taking the extra time to do this will make soldering and clean up a breeze.
Step 5: SOLDER AND CLEANING UP YOUR RING SHANK

I once again use my charcoal block, and make sure I flux really well. I place hard solder on the inside like I did with the bezel and after heating the entire ring focus my flame on the outside of the seam to draw the solder out. Once again, a less is more approach with the solder will help you maintain the textured border on your wire!

As you can see I have a little clean up to do.

Having a set of high quality needle files are beneficial for this type of clean up.

I used a three-square (triangle) and half-round needle file to clean up, and I also carefully sawed to match the the decorative border in one area that had filled with solder.
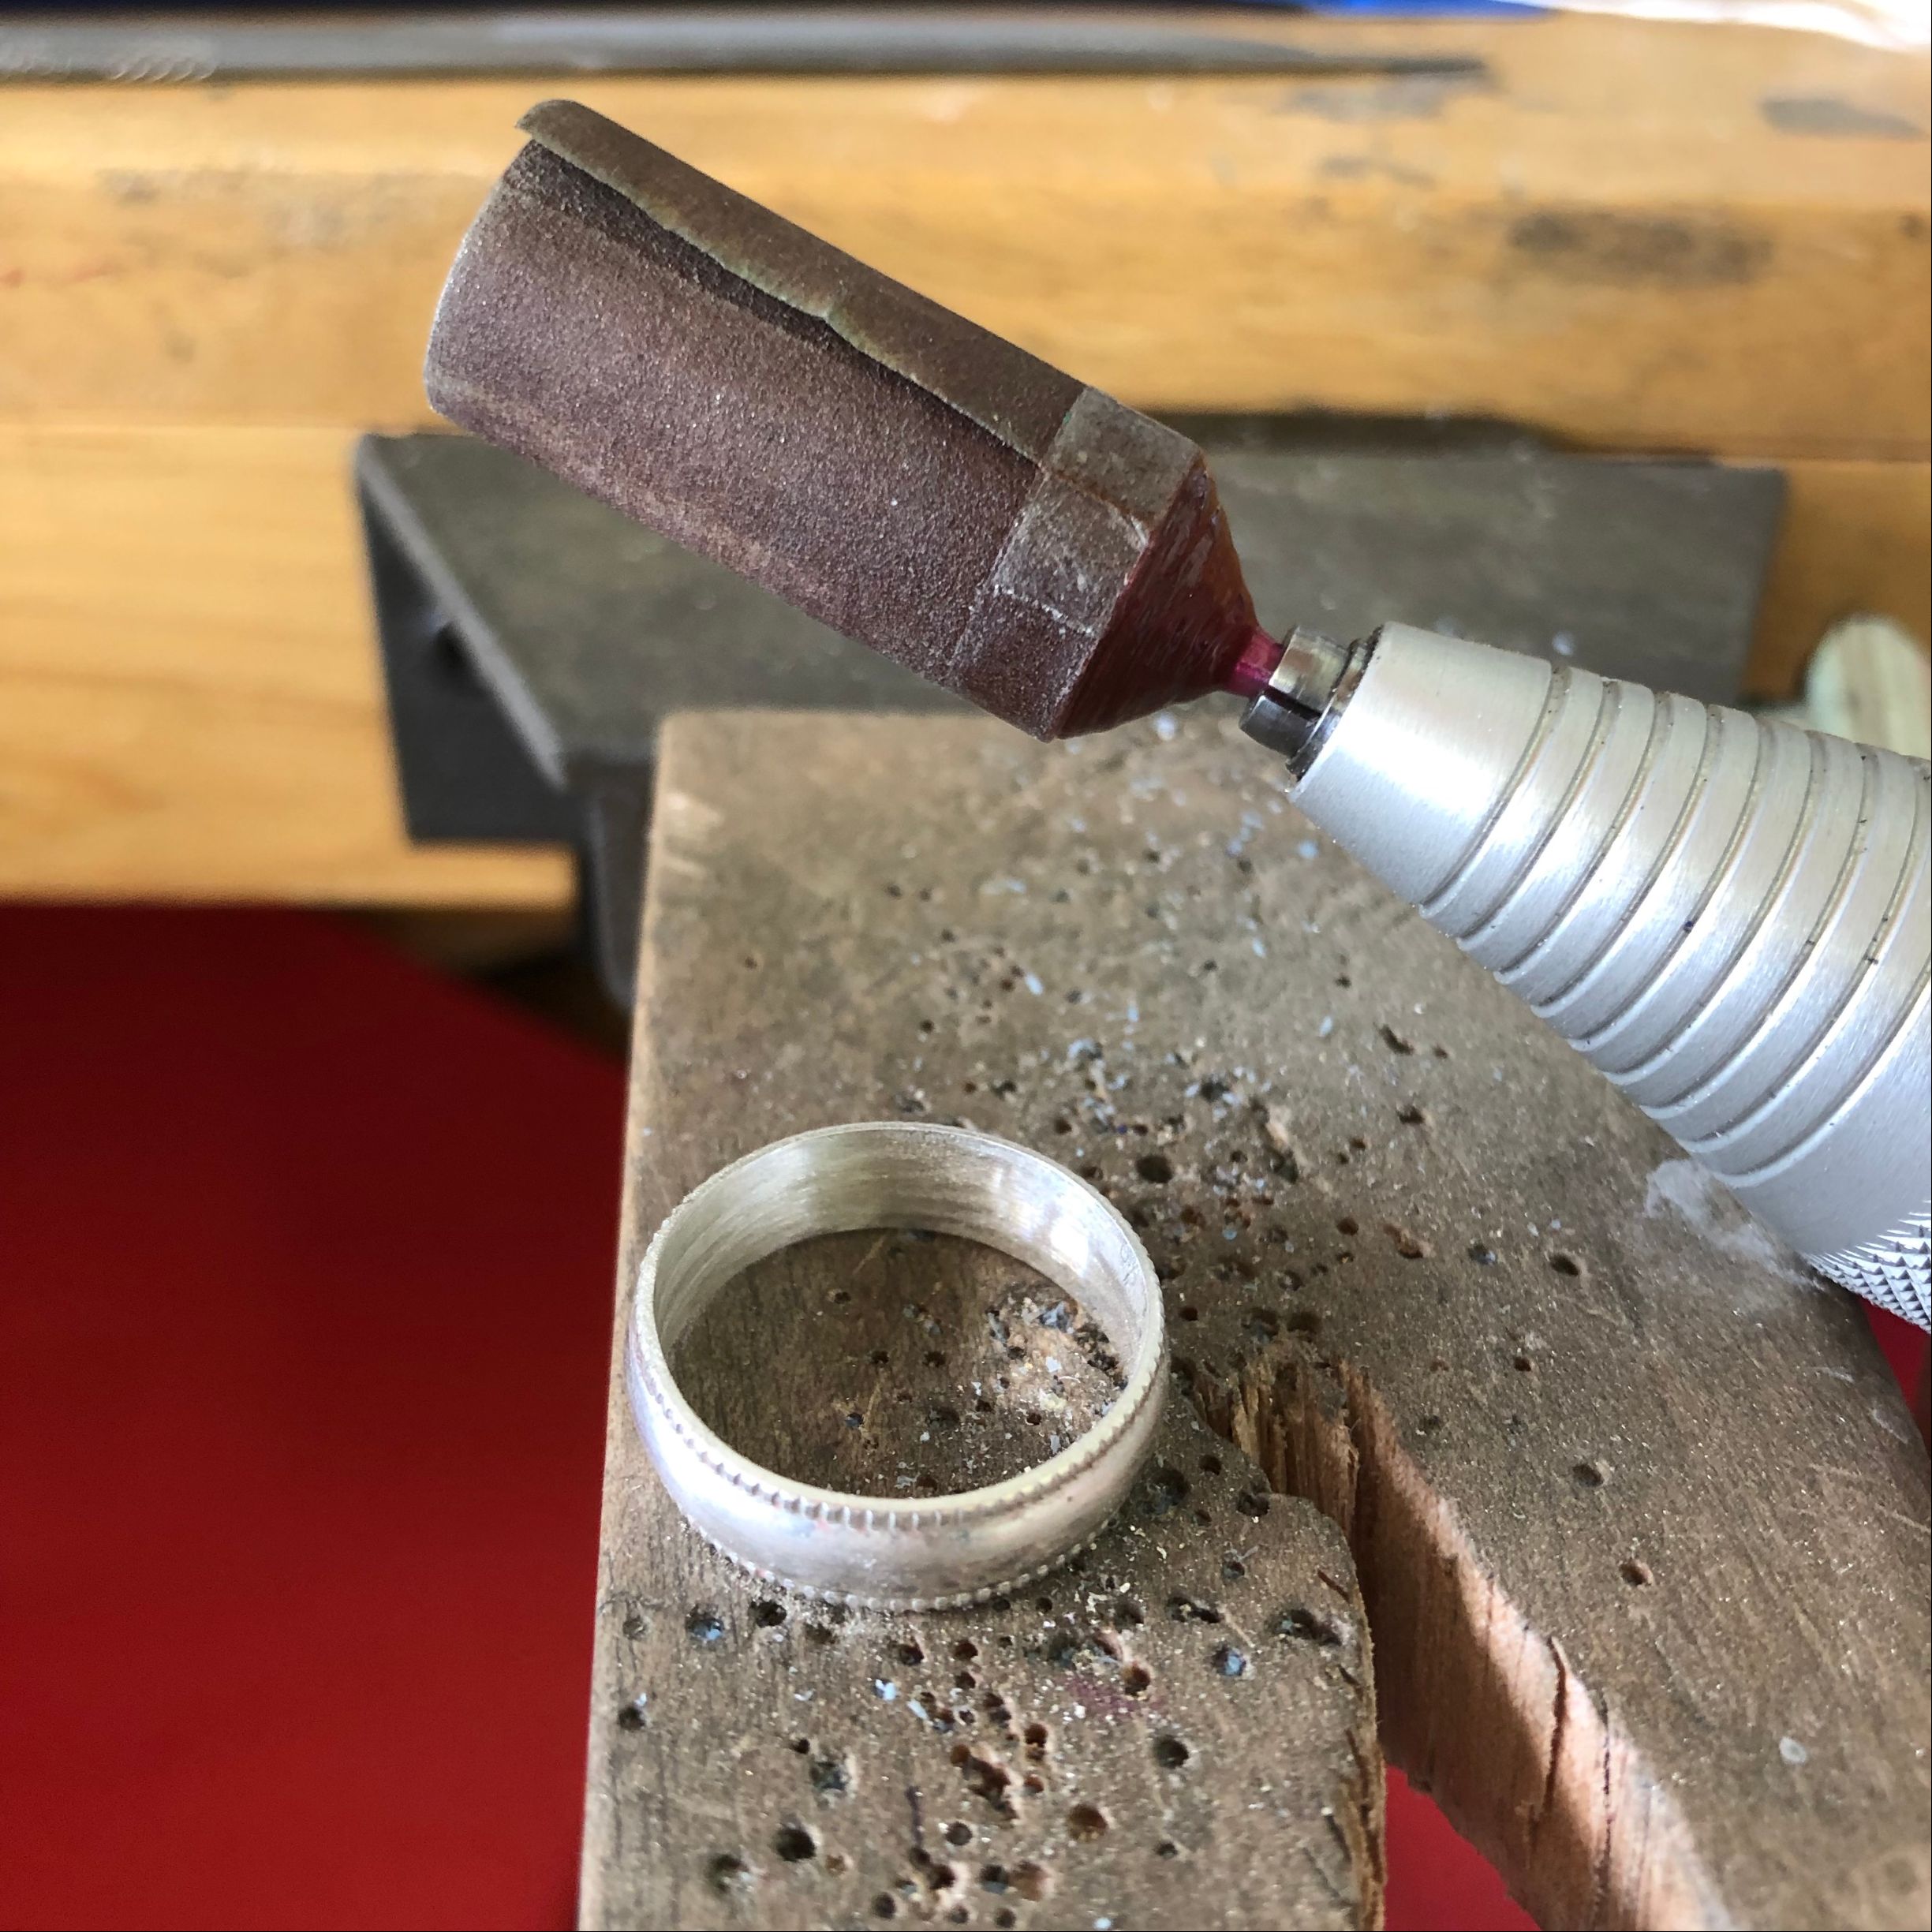
I also gave the ring a quick sand with a Mounted Sandpaper Cartridge in 320 grit (Item #337061) I still need to solder the bezel to the ring, so I don't need to go crazy with clean up just yet, but I like to remove the excess solder.
Step 5: CREATING AND SOLDERING THE BASEPLATE

Lay out your bezel onto your sheet and mark an area you will saw out, I left a generous border but you can be more precise if you like. Prior to soldering make sure your sheet is clean, your stone still fits in your bezel and that no light can be seen when the bezel sits on top of the sheet. Since you previously sanded your bezel you should be good. This is when the Knew Concepts Trivet ( Item #119343 ) is useful, it allows me to direct my flame on my baseplate to solder the bezel without melting. Once I solder (I used medium solder this time), I examine my bezel to ensure the solder flowed entirely and then I careful saw off as much excess as possible.

For now on, whenever I check my stone I'm going to place floss underneath so I have something to pull if the stone gets stuck. I continue to clean up my bezel, I find a combination of filing and using Moore's snap on discs (Item #337226) helps me rapidly remove material. I also place my ring in my miter jig ( I linked an economy version) and file a flat area, this is where the bezel will sit and it will make soldering very easy. I recognize not everyone has a miter jig so if you don't hold your ring firmly on your bench pin and slowly file, holding your file perpendicular.
I decided to create my flattened area directly on top of where my ring's original solder seam is, I need to be careful to quickly and effectively solder my bezel on without over heating that original solder seam. If you want you can also solder the bezel opposite your ring's original solder seam, whichever makes you most comfortable.

To solder my bezel on, I stuck the entire thing in soldering clay. This not only protects the gallery wire but easily allows me to create a set up where I can heat my piece from all angles. I flux and heat, then place two small balls of medium solder on one side. After heating the entire piece I focus my flame on the opposite side to draw the solder through.

HOORAY!
Step 6: POLISHING AND SETTING YOUR STONE

Prior to setting, I finished cleaning and polishing my ring. I used finer grits of the Mounted Sandpaper Cartridges to clean the inside, and if you are working with your flex shaft to do your polishing I really like the Dedeco Radial Discs for the outside. I also threw my ring in the rotary tumbler for a half hour with steel shots. I don't want to risk placing this gorgeous piece of turquoise in there so its best to tumble before I set. Now I'm ready to set my stone, and the most important thing is making sure my work is properly secured, I'm using a GRS Benchmate however you can use a vise with leather, a ring mandrel, or a ring clamp. Once my ring is secured I want to approach the gallery wire with extra care, pushing it down at north, south, east and west but only with 50% of the pressure i'd normally use. Gallery wire snaps easily and the last thing I want is to break the ring in the final stage. I'm using a simple pusher to carefully and gradually push down my bezel, until my stone is secure and I'm finished! You can also try using a wooden clothes pin to push down your gallery wire, this will prevent any damage to the stone from accidental slips.

I hope you have found this tutorial helpful (if you have please share on Pinterest!) You can comment below with any questions and be sure to follow @riogrande + @metalsmithsociety.
Huge thank you to Rio Grande for sponsoring this tutorial and be sure to check out their American Mined Collections. These collections of gorgeous gems allow you to trace your stone from the mine to your bench, making them a wonderful source for ethical gemstones.
If you decide to make one of these rings, I would LOVE to see! Be sure to tag me on instagram @metalsmithsociety so I can share, and use #riograndeamericanminedgems!