Please note: This is a sponsored tutorial.
In honor of America Recycles Day, November 15th 2019 I have partnered with Stuller to create an earring project made entirely from SCS certified recycled metals! Stuller is committed to ethical sourcing and environmental sustainability in all aspects of their operations. They have a Responsible Sourcing Protocol and use 100% recycled materials in their manufacturing processes! Before we get into the project let's discuss some of the negative impacts of mining metals and why using recycled is so important.
THE ENVIRONMENTAL IMPACT OF METAL MINING
*This excerpt was taken from the book "Sustainable Jewellery" by Jose Luis Fettolini published by @promopresseditions you can purchase it here.
"The extraction of gold and silver has a big impact on the areas and regions where mining operations are set up, since huge quantities of the earth are removed and polluted. River courses are altered and farming activities curtailed. The development of indigenous communities is also affected, and they are forced to abandon the place where they were born and raised, something which leads little by little to the disappearance of many aboriginal cultures and populations."
There are other issues as well, such as illegal mining, mercury and other chemical pollution and the negative social impacts on the individuals doing the mining. For more information on sustainable and ethical practices, I cannot recommend Fettolini's book enough!
RECYCLED METALS
Stuller is a supplier that uses SCS Global Services ( a third party) that awards certifications that guarantees metals are 100% recycled. When working on this project I was amazed I could find anything I needed: solder, sheet, wires, bezel, earring wires and other findings! Their entire fabricated metals assortment is SCS certified! So without further adieu, here is a step by step tutorial to create a pair of hoop style earrings with ethically sourced turquoise and 100% recycled metals from Stuller!

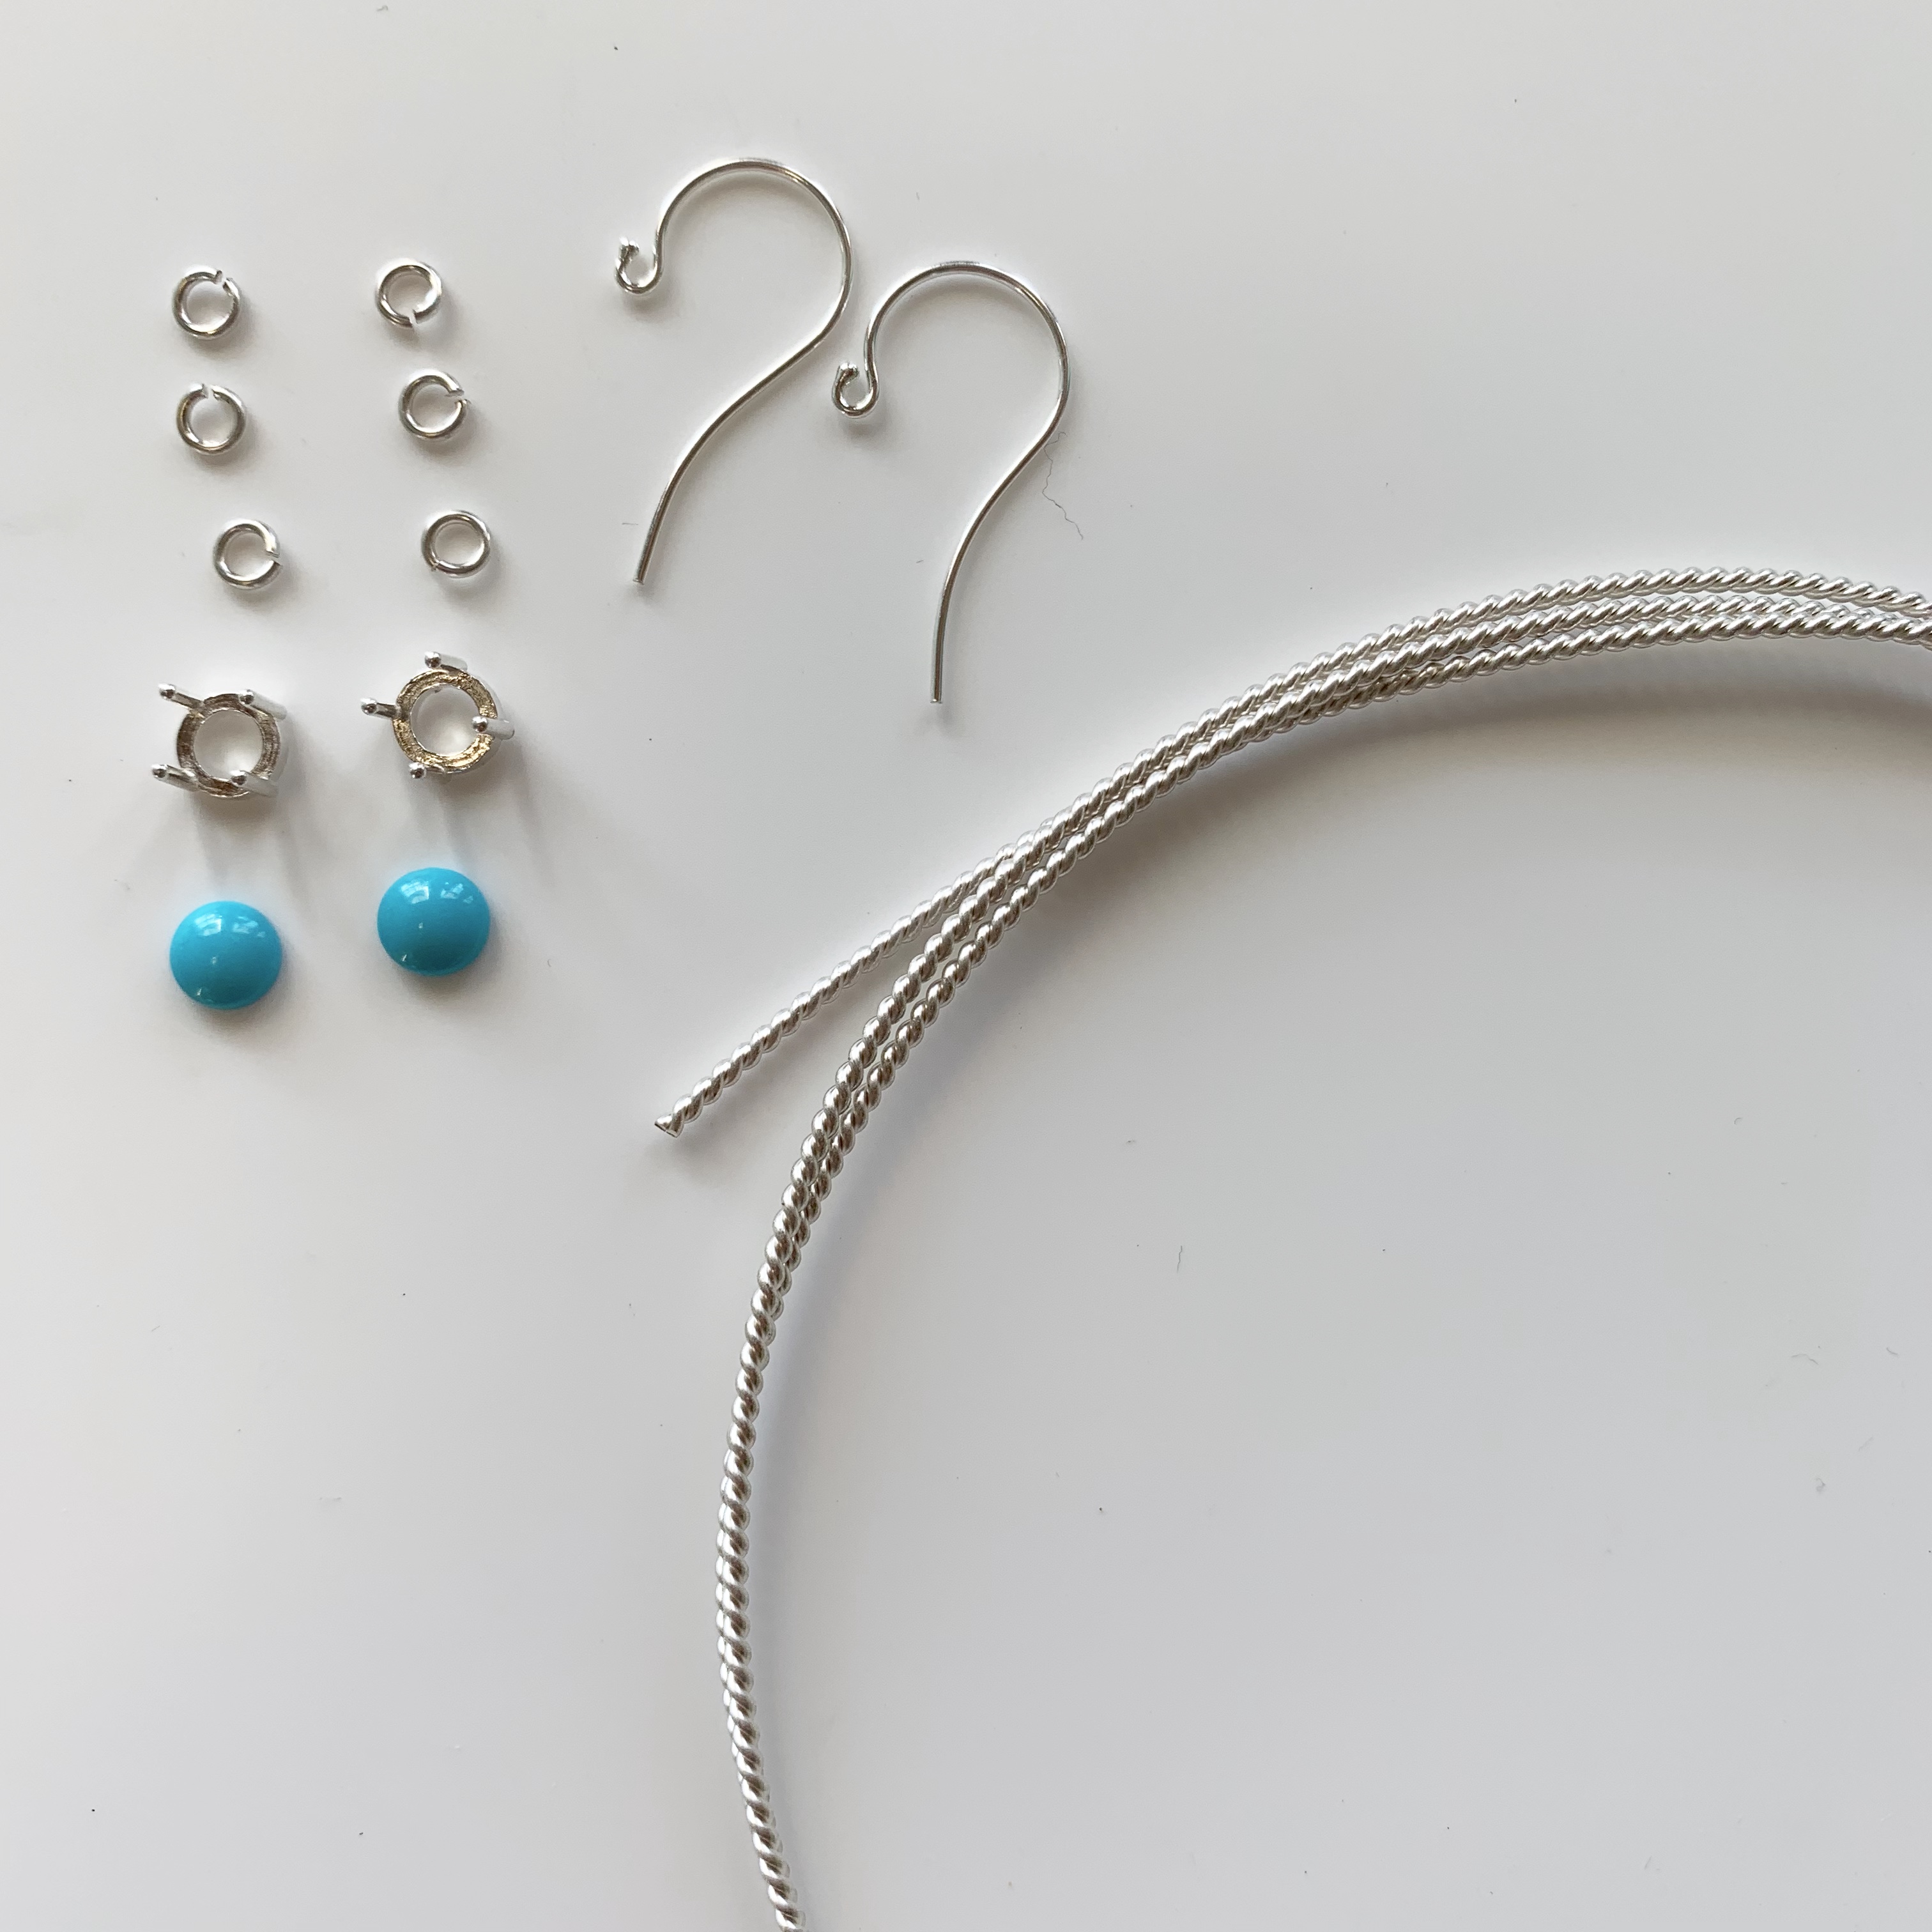
Materials List:
- Twisted Round Wire - Item #: 295343 - 14g silver, the minimum is 36" and the cost based off of current metal prices is $10.65 (this will vary.) You will have a bunch left over for another project, or you could make two pairs of earrings ;)
- French Wire - Item #: 22530 : 289158 -24 x 10.8 mm silver, they are about $1 each. I think it's good to have a few more than you need in case you mar one by accident.
- Round Jump Rings - Item #: JR25:80030 - 20g silver, Outside Diameter 4.1mm. They come in a bag of 36 and the cost based off of current metal prices is $4.64 (this will vary.)
- 6mm Round Cabochon Setting - Item #: 396:1015 - Silver, the cost based off of current metal prices is $8.57 each. I would definitely order an extra just in case. You can always make a matching ring or pendant!
- 6mm Turquoise Cabochon - Item #: TURQUOISE-GEN:115231 they are currently $8.35 per stone, I also ordered an extra here, but that is just me being cautious.
- Chip Cadmium Free Medium Solder - Item #: SOLDER:295125:P - one dwt is about $2.50 and more than enough solder!
If you order no extra settings or stones that puts this project in the ballpark of $55 cost.
TOOLS LIST:
Firescoff Flux - Item #: 54-4414:100000:T - prevents firescale and is one of the healthiest options to work with in your studio.
Thermo-Loc® - Thermo-Loc is a special reusable polymer material that is rigid at room temperature yet becomes softly pliable when heated/warmed. Used to secure your work while setting.
Rubber Wheels - to clean up your prongs. I like the Edenta Rubber Wheels.
Ring Mandrel - To form your hoops.
Plastic Mallet - to work harden and reform hoops.
Pliers - To open and close your jump rings.
Flush Cutter - To cut the twisted wire and trim the prongs.
Prong Pusher
Optional - Thermo Shield Paste
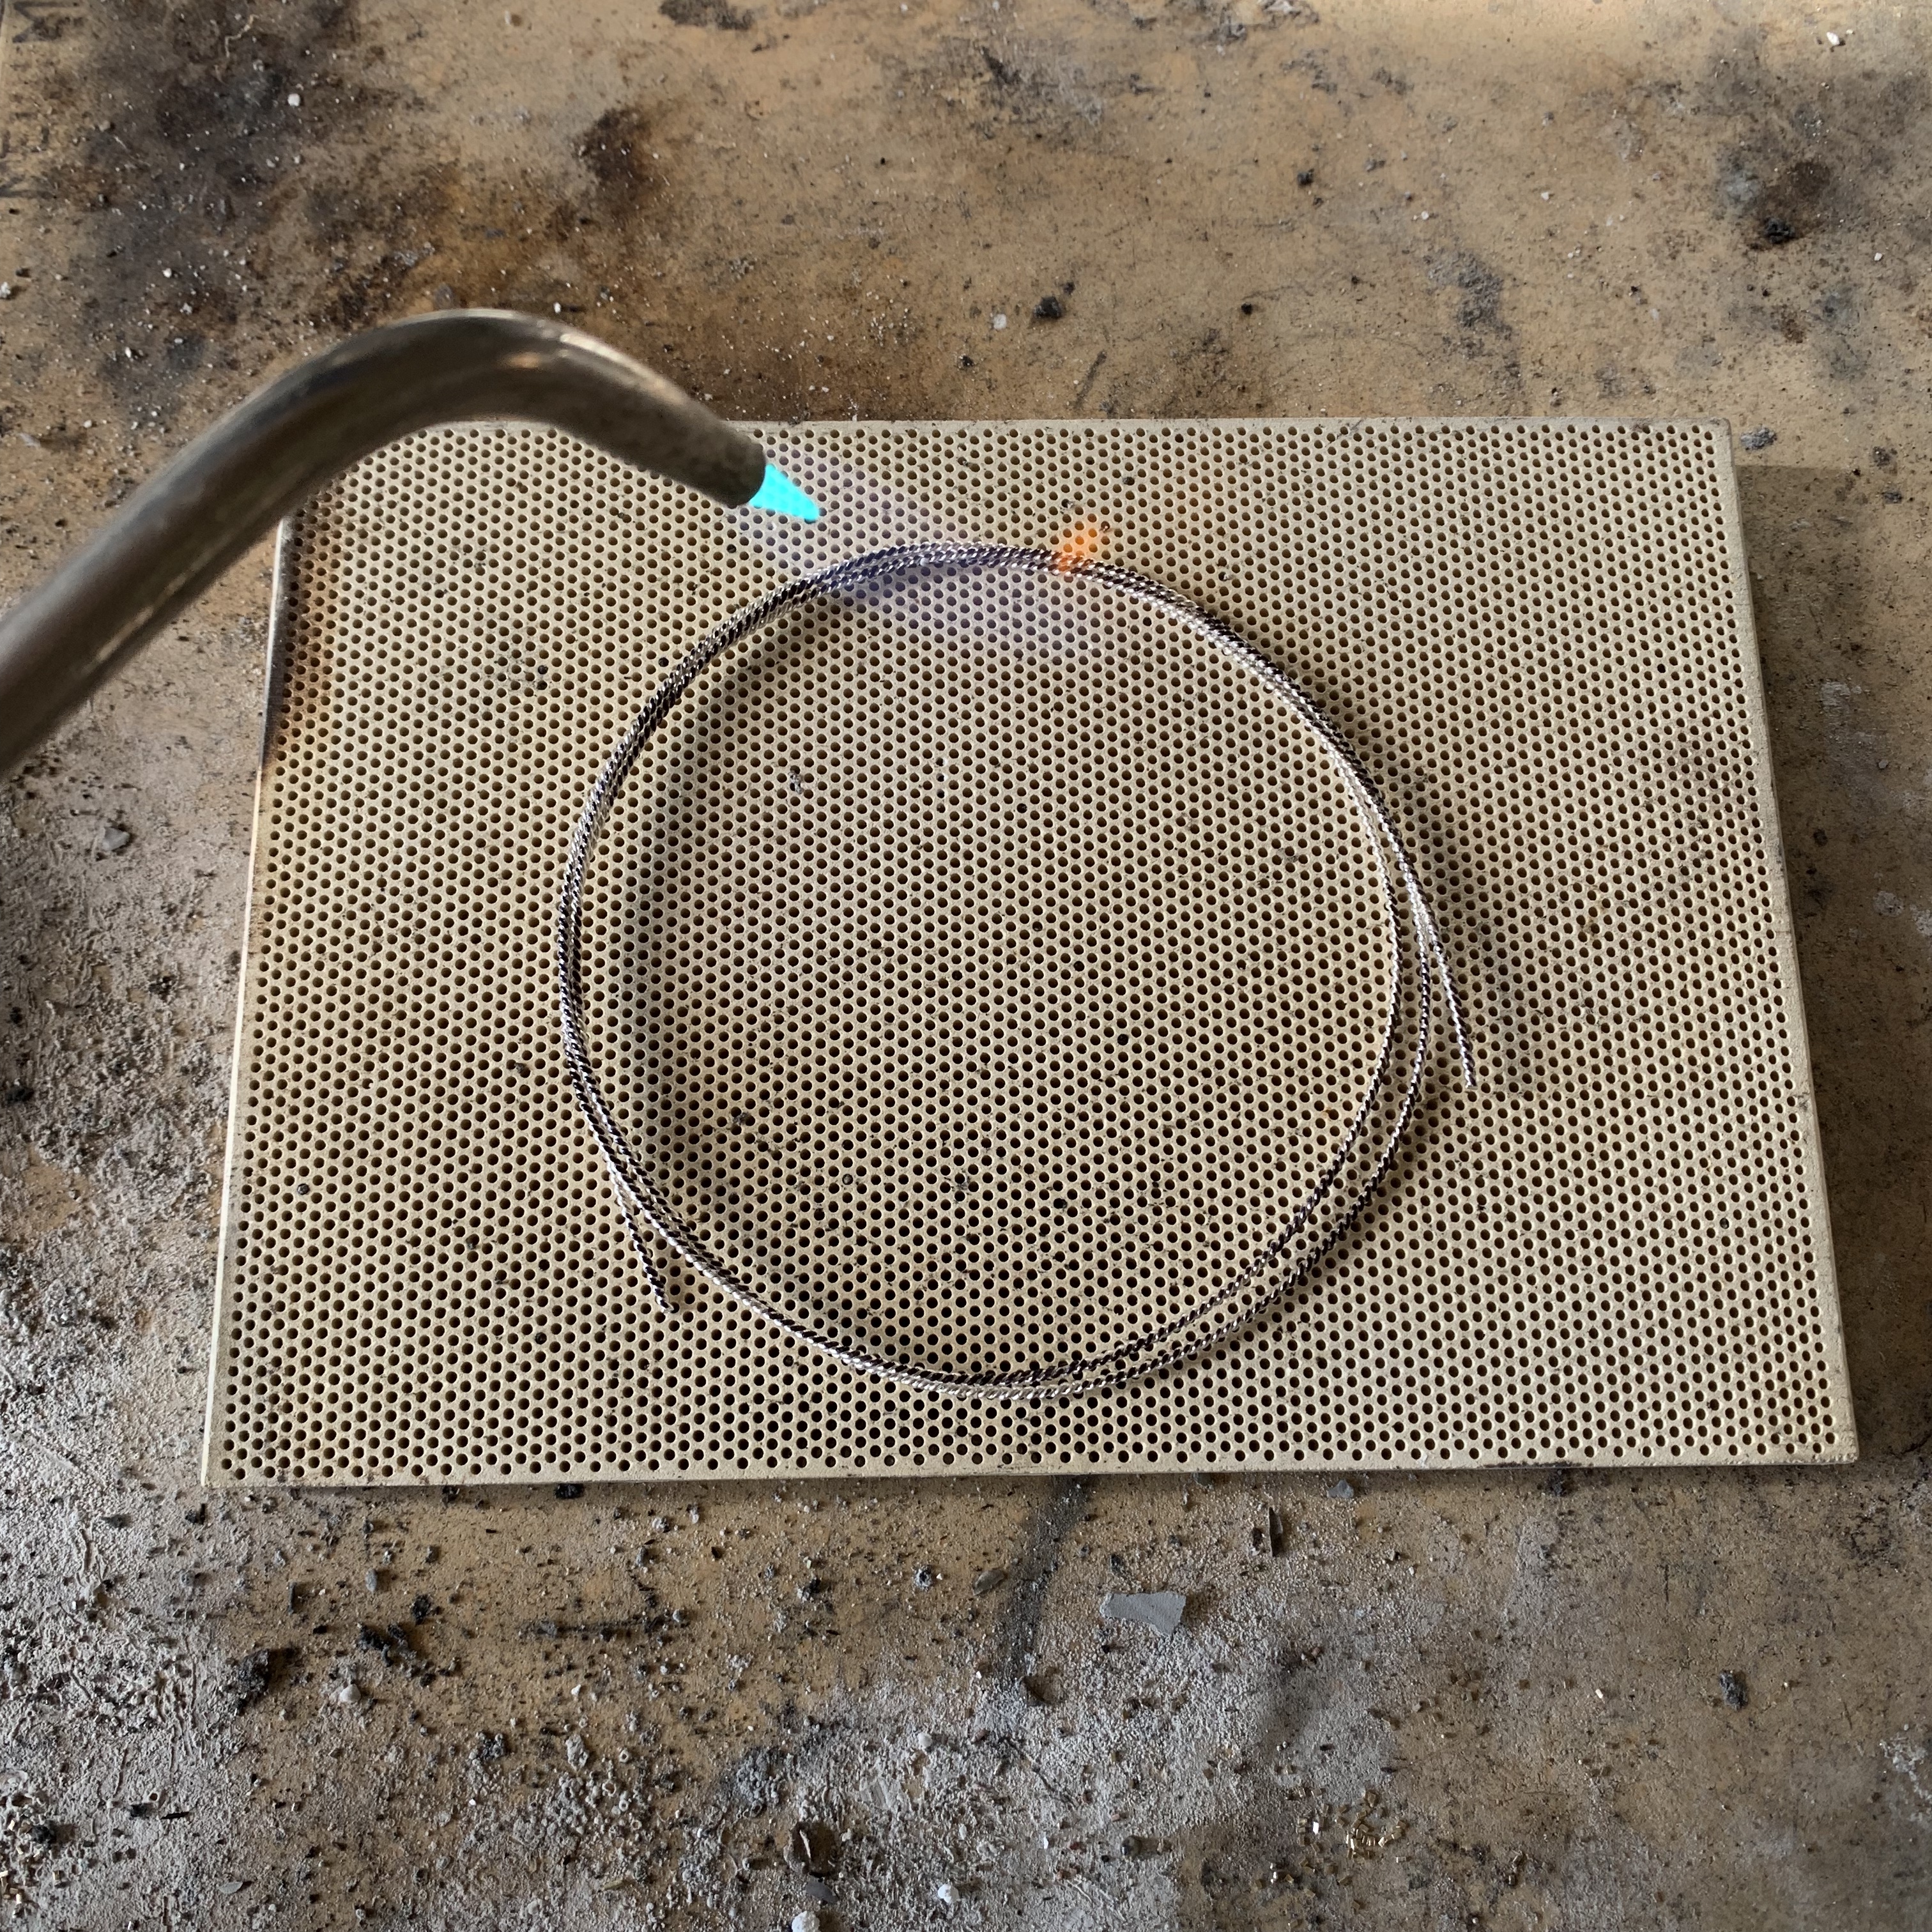
Step 1: Anneal your twisted wire:
Before we start bending this beautiful twisted wire we want to make sure it has been properly annealed. I like to tuck the ends in so that I've formed a nice coil. I then spray the wire evenly with Firescoff, this will protect the wire from getting firescale. When annealing I am using my Smith® Silver Smith™ acetylene torch with a #1 torch tip. I keep my flame soft and am super careful not to overheat. Pickle. TIP: You can also apply some sharpie to the wire and just anneal to the point of the marker disappearing!

Step 2: Solder a jump ring to each setting:
These cabochon settings are such a huge time saver, I love using them! They are cast, so they require a few minutes of clean up prior to soldering. TIP: Use a steel block to ensure a flat surface and some 400 or 600 grit sandpaper and sand the bottom using a figure 8 motion!

Spending a few seconds sanding the bottom is a small step you want to do before you solder!

On the left is what the setting looks like without any sanding.
Next I'm setting up to solder a jump ring to each setting. I will use a third hand to hold the jump ring in place. I will apply Firescoff and then solder with one chip of medium solder. For this I switched to my #00 torch tip. TIP: Use your sharpie to mark a center point on the setting to make sure your placement is correct when soldering! Next file a small flat spot where the jump ring seam is. You will be ensuring a better connection for the solder to flow, soldering the jump ring closed and hiding the seam all in one! Pickle. Repeat for both settings! Sometimes mistakes can happen that is why I like to have an extra setting or two on hand, great if you don't end up making a mistake but nice to have on hand if you do!


Step 3: Forming the twisted wire:
This part is a bit subjective because you can make the hoops whatever size you would like! I used the bottom of my ring mandrel to form a coil, then I marked with a sharpie down the middle. TIP: Once you have cut one hoop you can line it up to match your next cut, since these don't need to be precise this is a quick method to get two even pieces! I file the ends nice and flat so that I can create a beautiful solder seam. The more care that goes into this, the less clean up I need to do later on!


Once the first piece has been cut use it to cut the second.
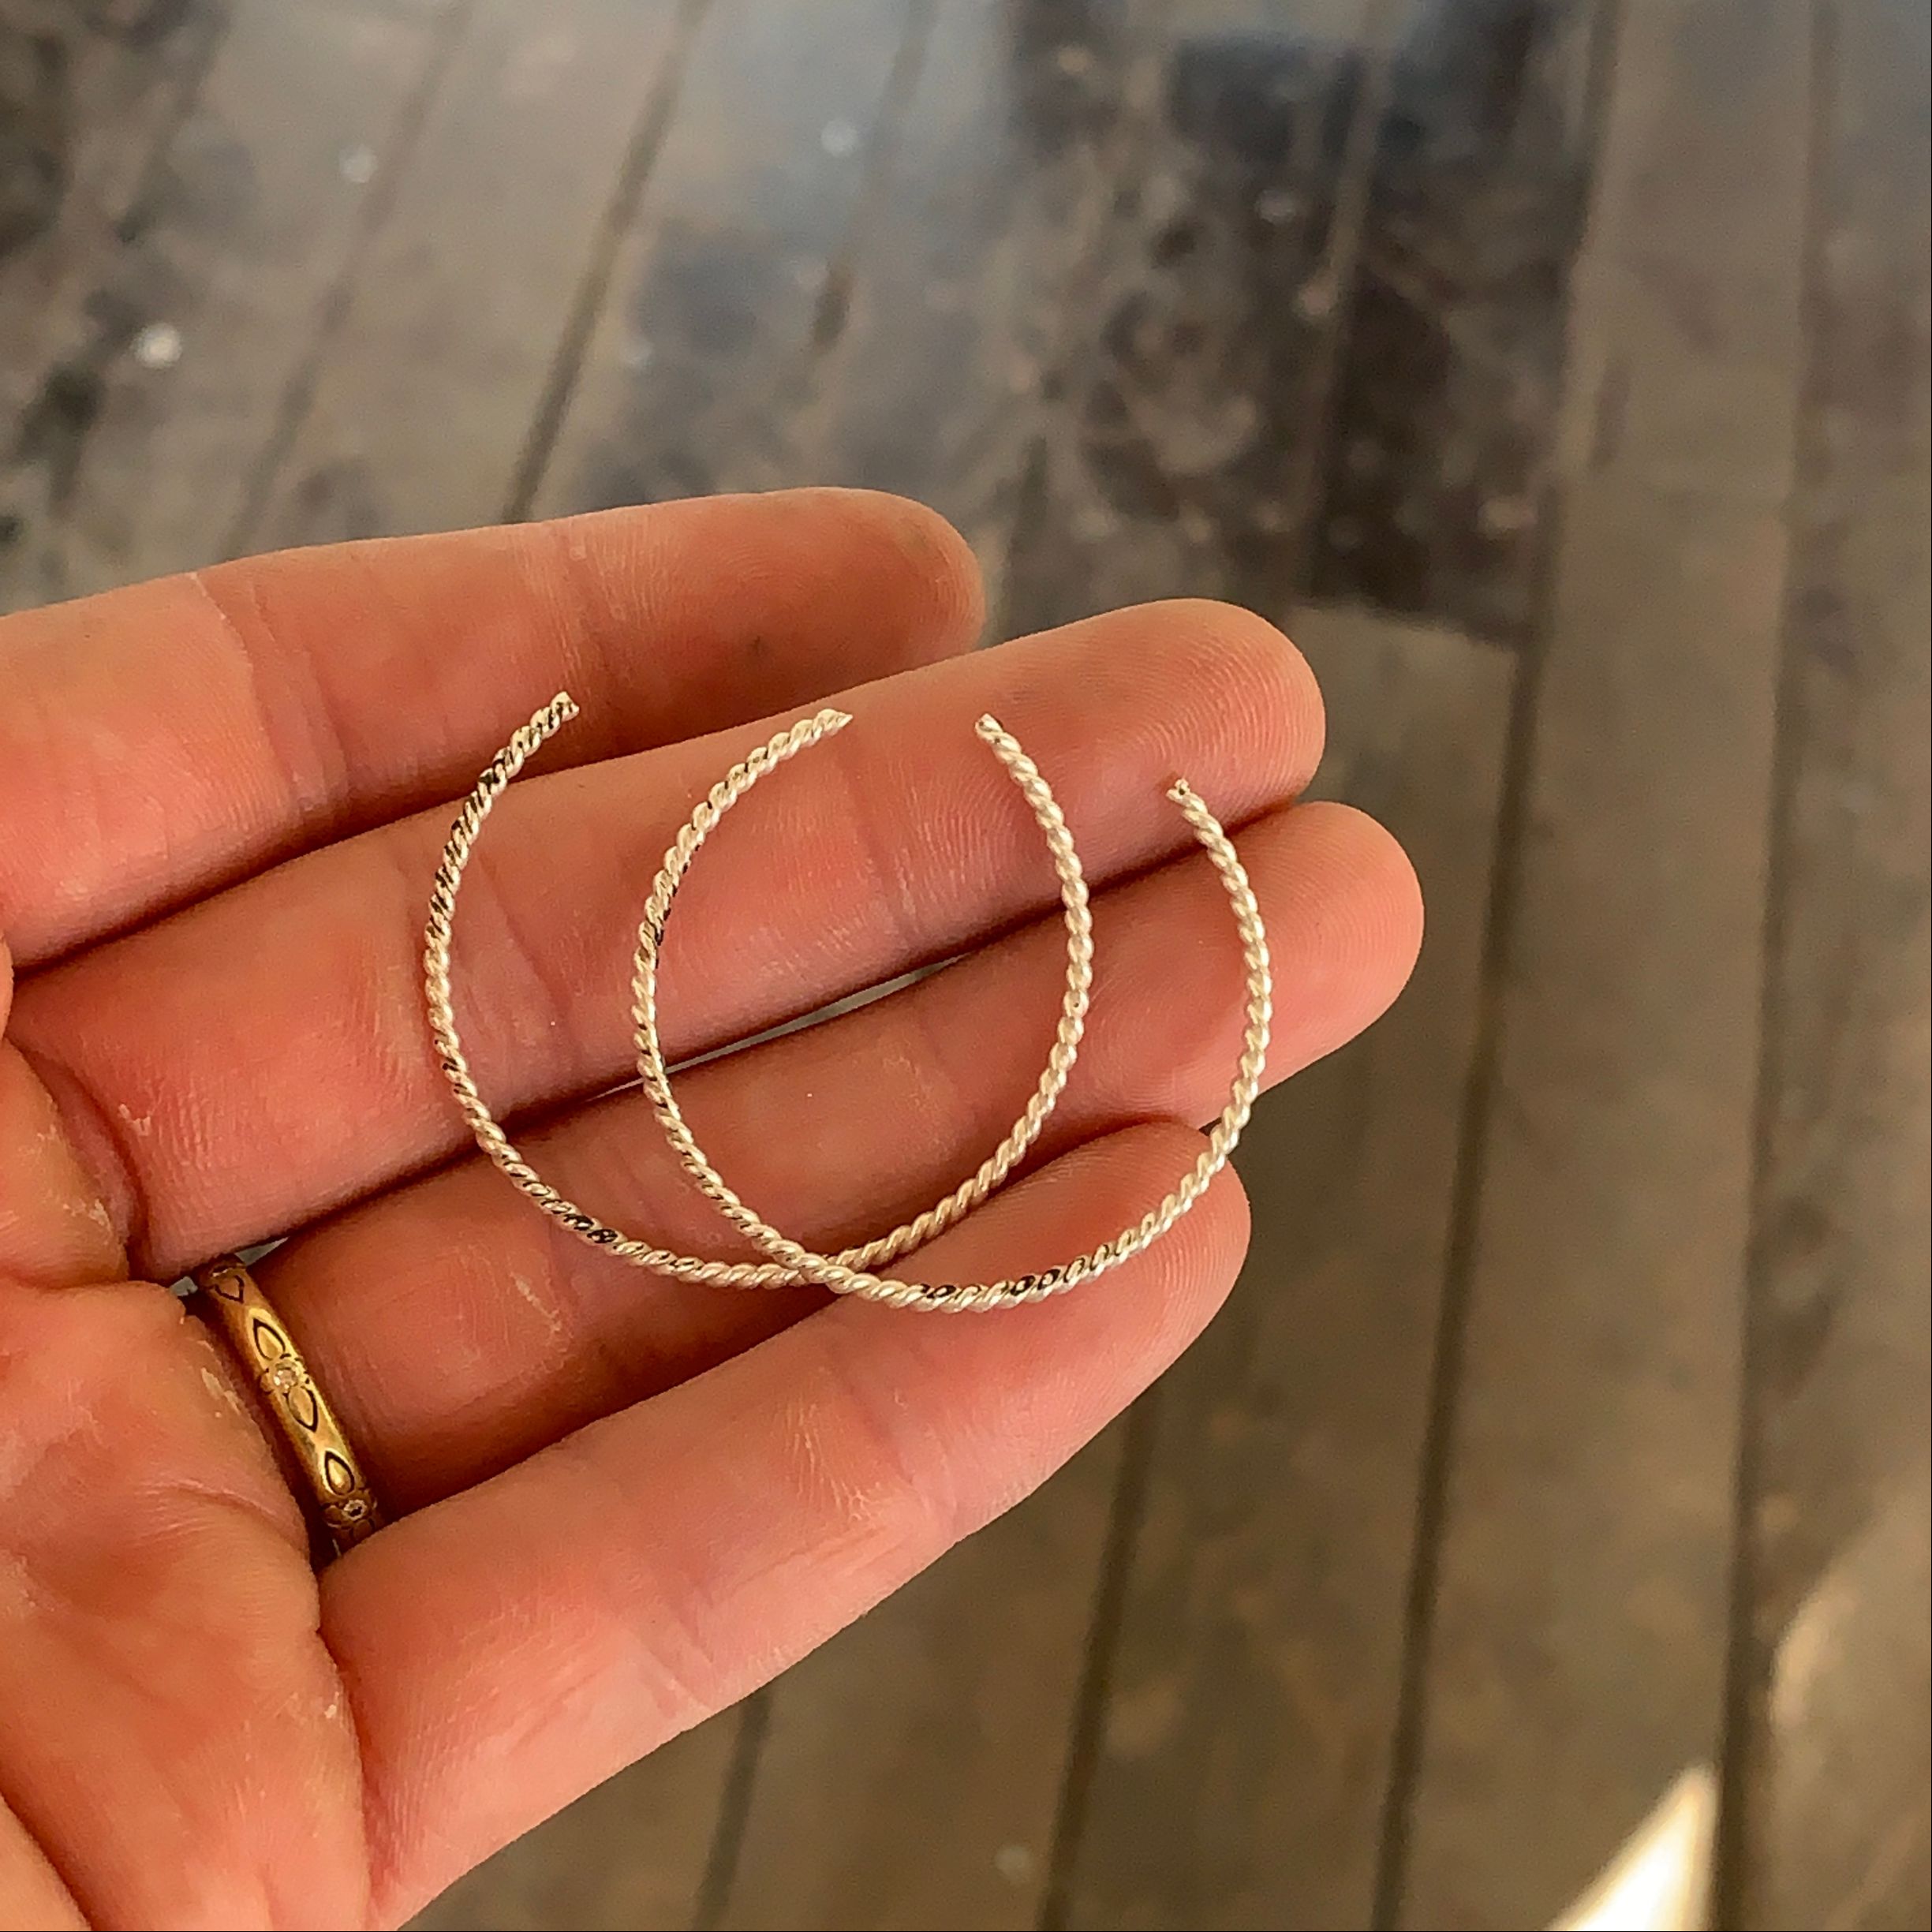
Make sure you have two even wires.
Step 4: Solder two jump rings together:
These jump rings will connect the hoop to the earring wire! I used my #00 torch tip again, apply Firescoff and use a tiny piece of medium solder. I like to ball my solder and place it on the seam, but this is not necessary. Pickle. TIP: Use your third hand to secure one of the jump rings with the seam pointing north. If melting or soldering together is an issue you can paint on a little Thermo Shield Paste to the bottom jump ring to ensure the jump rings don't solder together! If you use the paste be sure to thoroughly clean before soldering the other ring! You need to solder two jump rings together for each earring, so repeat this step.

Step 5: Assemble all your pieces and solder your twisted wire:
Now we will thread our setting and our two connected jump rings onto our twisted wire and solder it closed! In order to get the ends of the twisted wire to meet I bend it into an oval, but don't worry we will fix this later on! TIP: Hold the hoop up to the light to ensure that the seam is meeting perfectly! If it's not right, go back and file a little more until it's perfectly flat! This tip can be applied anytime you solder anything but in this instance the seam is in patterned wire and quite visible so we want to take extra care! Once again I used my #00 torch tip, apply Firescoff and use a tiny piece of medium solder. Pickle. Repeat for the other earring.


Step 6: Reshaping the hoops:
Now I will use a plastic hammer to reshape my hoops on the mandrel. You could also use a raw-hide mallet, you just want to use something that won't mar your metal. TIP: I happen to have a grooved mandrel, and this came in handy because I placed the setting and jump rings in the groove while I hammered. This protects them from getting marred, but if you are gentle while hammering a regular mandrel will work just fine. This process of hammering will also help work-harden your hoops! Once I have a shape I like, I spend a minute or two giving the solder seam a quick polish. You can use what you have whether its radial discs with your flex shaft or a polishing machine. Now you can attach your french wires! I use my pliers to carefully open and close them onto the jump ring that is not attached to the twisted wire. Next you can tumble the earrings if you have a rotary tumbler. I recommend twenty minutes with steel shots before moving on to setting the stones! Many gemstones can be damaged in a rotary tumbler so it's good to be cautious and tumble prior to setting stones!


Step 7: Setting the stones:
We are going to want to secure our settings in Thermo-Loc® or another comparable material! Thermo-Loc® is a special reusable polymer material that is rigid at room temperature yet becomes softly pliable when heated/ warmed. Since I have a jump ring soldered onto each setting, it will not sit flat so using some Thermo-Loc® will hold it perfectly while I push my prongs down! TIP: Use a crafting heat gun to warm up your Thermo-Loc® I used this one. Careful they do get very hot!

I have a little bit of work to do on these prong settings before I can set the stone! I begin by gently opening the prongs with my prong pusher. TIP: Cover your prong pusher with painters tape, to help prevent damage to the stone if you accidentally slip! Next I take a small ball bur (I used a 1.4mm) to cut a seat for the stone. I cut about 1/3 of the way into each prong where it meets the base of the setting. I found that I needed to go at a slower speed to have control and prevent the bur from catching on the prong. Once the stone is sitting nice and flat in the setting, I can move on to the next steps!

I take my stone out and trim about 1mm off the prongs using my flush cutter. You can in theory keep your prongs longer or go shorter it depends on the look you want! Next I use a rubber wheel to shape the prongs, you can do a claw shape, you can use a cone bur to round them, this part is also up to you! Once I've done some shaping I put the stone in the setting and gently push each of the prongs starting with north and south, then east and west. I use my prong pusher (still covered in tape) and I'm not pushing all the way down, I'm doing it gradually to avoid having the stone shift. Once I've pushed the prongs all the way down I can continue to shape the prongs a bit more with the rubber wheel, I'm careful not to hit my stone but the rubber wheel is safe just in case I do.


This is my prong pusher covered in tape.

To shape my prongs I used a knife edge rubber wheel like this one.

Once I have set both stones and I am satisfied with the prongs, my earrings are complete! I hope you enjoyed the tutorial and if you create the earrings be sure to tag me and @stullerinc so I can share on the page!
Thank you Stuller for sponsoring this tutorial!
Be sure to give them a follow on Instagram @stullerinc
You can shop for all your recycled metal needs here.