
Every week on Metalsmith Society I explore a different tool used in jewelry making for #tooltalktuesday! It has been a wonderful opportunity to deep dive into different tools and discuss with members of our community! Some of these posts are sponsored, without this support the page would not continue to run daily. So thank you for your support of our sponsors in 2019, when you purchase from them (or my Amazon links) you are supporting the page! Here is my list of the top nine #tooltalktuesday posts of 2019:
Luxi Polishing Compound
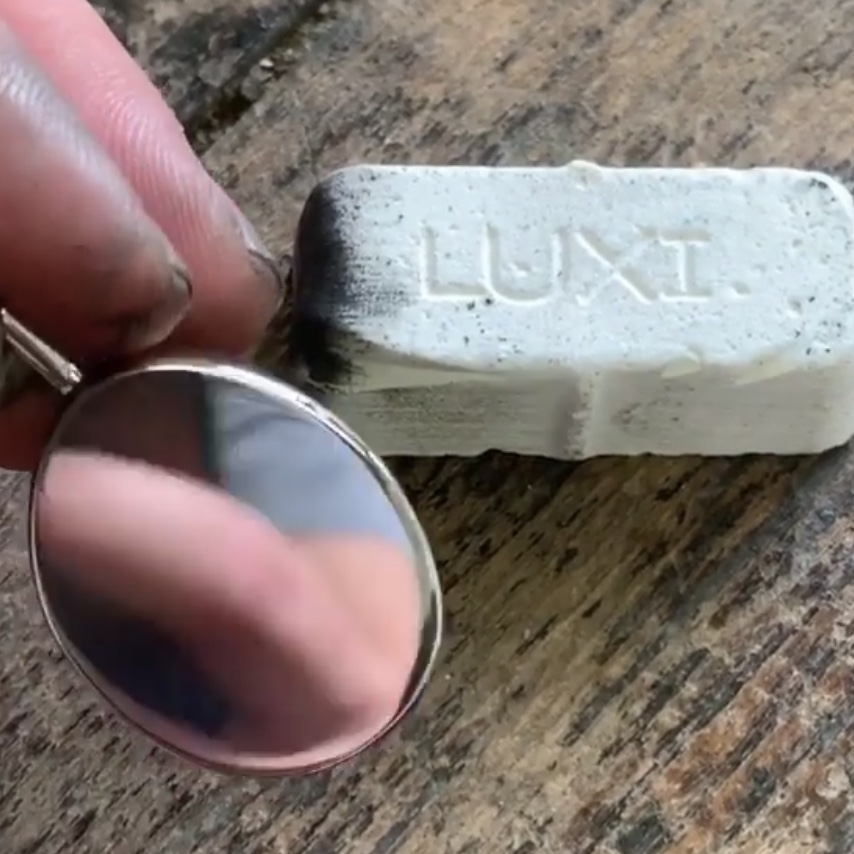
These silica-free polishing compounds are free of animal fats, contain no hazardous materials, and are made of an alumina oxide abrasive in a water-soluble binder (which makes them safer to use). They're designed with vegetable fats and you can use less (saving you money) since the compound stays in place on your buff. The residue is easy to remove because they are water-soluble. @riogrande sent me the LUXI Sample Bar Assortment (Item#: 331111), which is an awesome and inexpensive way to try them all! Always use a dedicated buff for each compound to avoid cross-contamination! Determining which compounds are "best" is subjective but if you want a simple 3-step process, I recommend starting with the gray LUXI (Item#: 331090) an aggressive compound that will do scratch removal and pre-polishing. I used a 4” tight muslin buff (Item#: 330147) on my Foredom Bench Lathe. You can also use a yellow treated buff which is more rigid, allowing you to get more aggressive with your polishing. Next, I used the blue LUXI (Item#: 331095), which I also used with a tight muslin buff. It's also a pre-polish but brings you closer to your final polish. Lastly, the white LUXI (Item#: 331097) with a balloon cloth wheel (Item#: 330651). This got me my final mirror finish! The videos speak for themselves but LUXI is definitely an awesome option for polishing! For your flexshaft you can find the yellow treated, tight muslin and balloon cloth wheels in 1” versions that you can use with a screw mandrel from @riogrande. Also, the Asian Blue, Green, and Purple are formulated to work better at lower speeds and temperatures, so they are ideal for someone like me using a Foredom Bench Lathe (it's slower and not as hot as a polishing cabinet). On full speed, I did get a great finish using Gray, Blue, and White, so feel free to experiment!
Purchase the sampler here.
See the post here.
Bench Anvil Kit
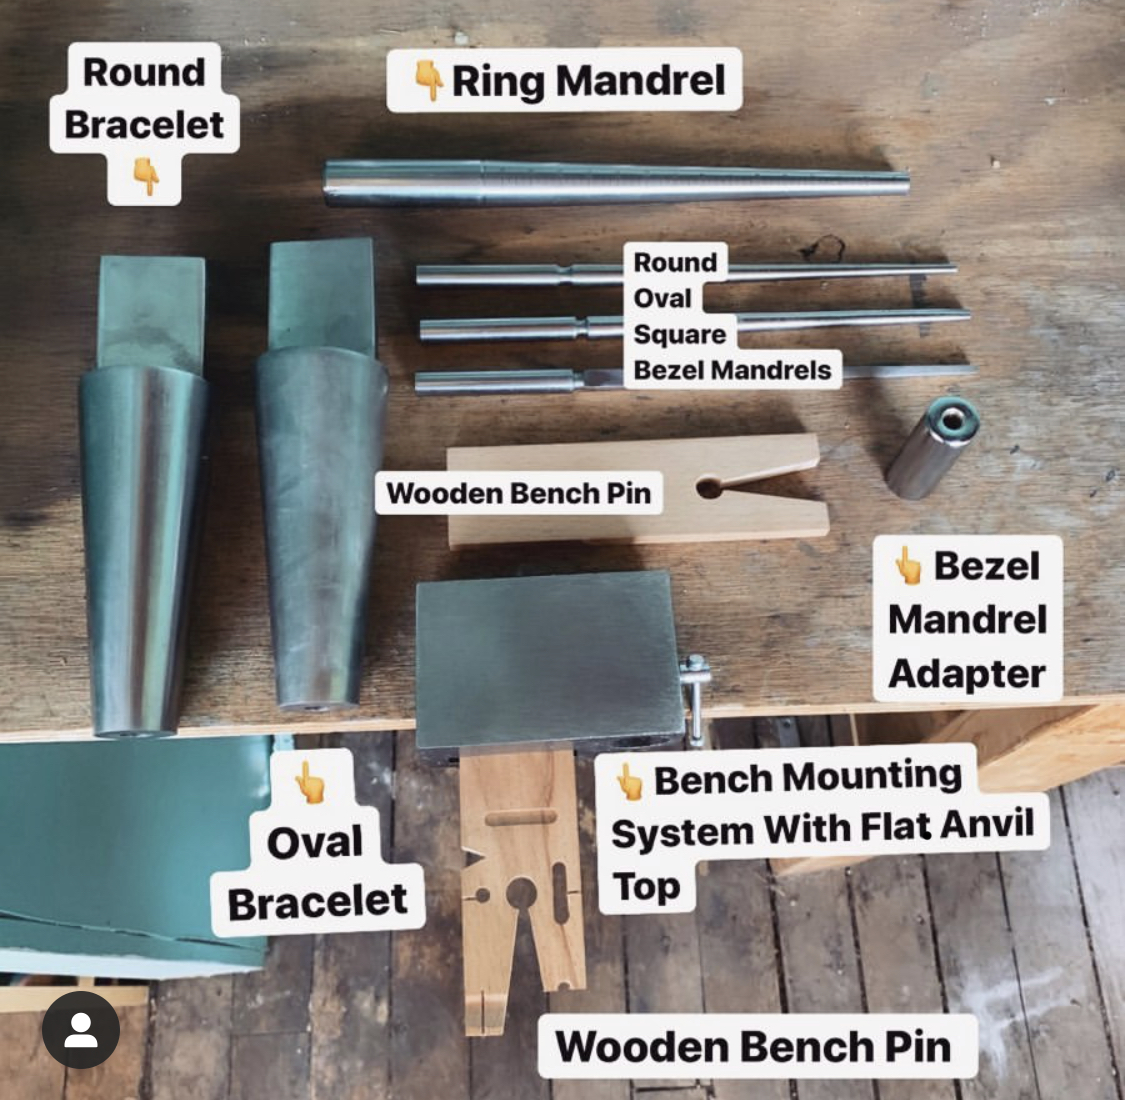
This kit gives you two bench pins, a small flat anvil area for stamping, two bracelet mandrels (oval + circle), a standard ring mandrel and THREE bezel mandrels (circle, oval + square). So if you are looking for a lot of versatility and an all-in-one type tool this one is great! Please keep in mind the clamp opens to a maximum of 2.25” so measure your intended workspace prior to ordering! This tool is perfect for travel and small spaces. I love that you can attach it to most tables and then pack it away if need be (do me mindful hammering on this could mar a table). I found hammering and forming on it secure. You do need to make sure the clamp is as tight as possible before you hammer aggressively :) I also had an opportunity to work with an additional mandrel set comprised of 8 different sized mandrels in parallel, stepped, and tapered shapes. They are specially designed to fit the Bench Anvil Kit, giving even more working possibilities out of it! I’ve been using them for earring wires and hoops!
Purchase the kit here.
See the post here.
Whaley Sliding Hammer
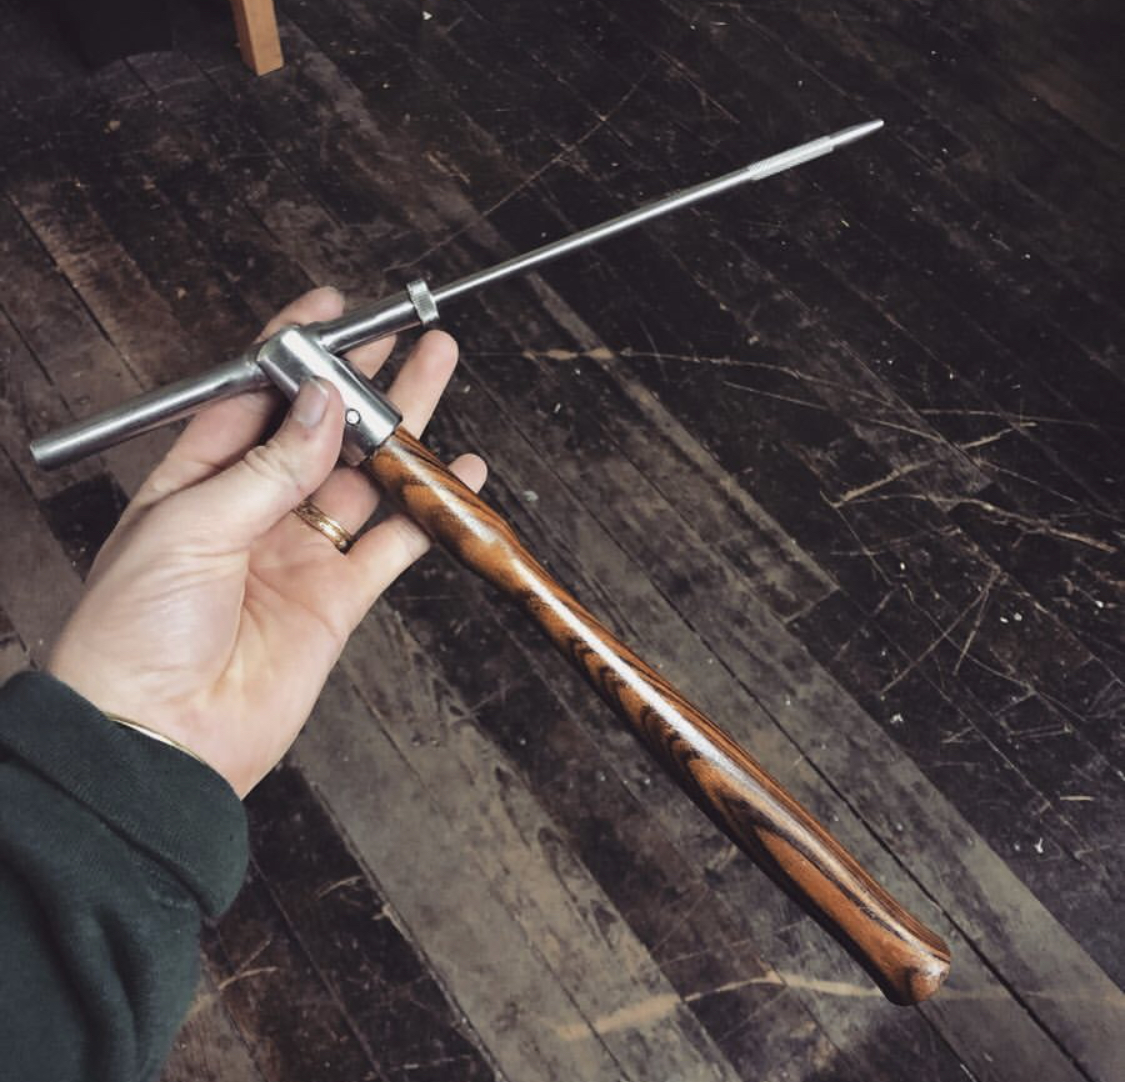
This amazing tool is super useful for stone setting, it allows you to stabilize as you hammer. You select a punch and screw it into place, then it slides back and forth inside the hammer. I got a wide variety of punches and I hope to experiment more and show off some other things the hammer can do. For setting it allowed me to strike with the right amount of force but remain in control 😍 My close up videos are sped up, but meant to show how awesome this tool works to get my bezel closed. Afterward I protected my stone with painters tape and filed it, down. I’ll likely follow up with a silicone wheel.
Purchase the Whaley Hammer here from Otto Frei and use code MMS719X to save 5% off your purchase and support the page!
See the post here.
Foredom Flex Shaft Handpiece Holder
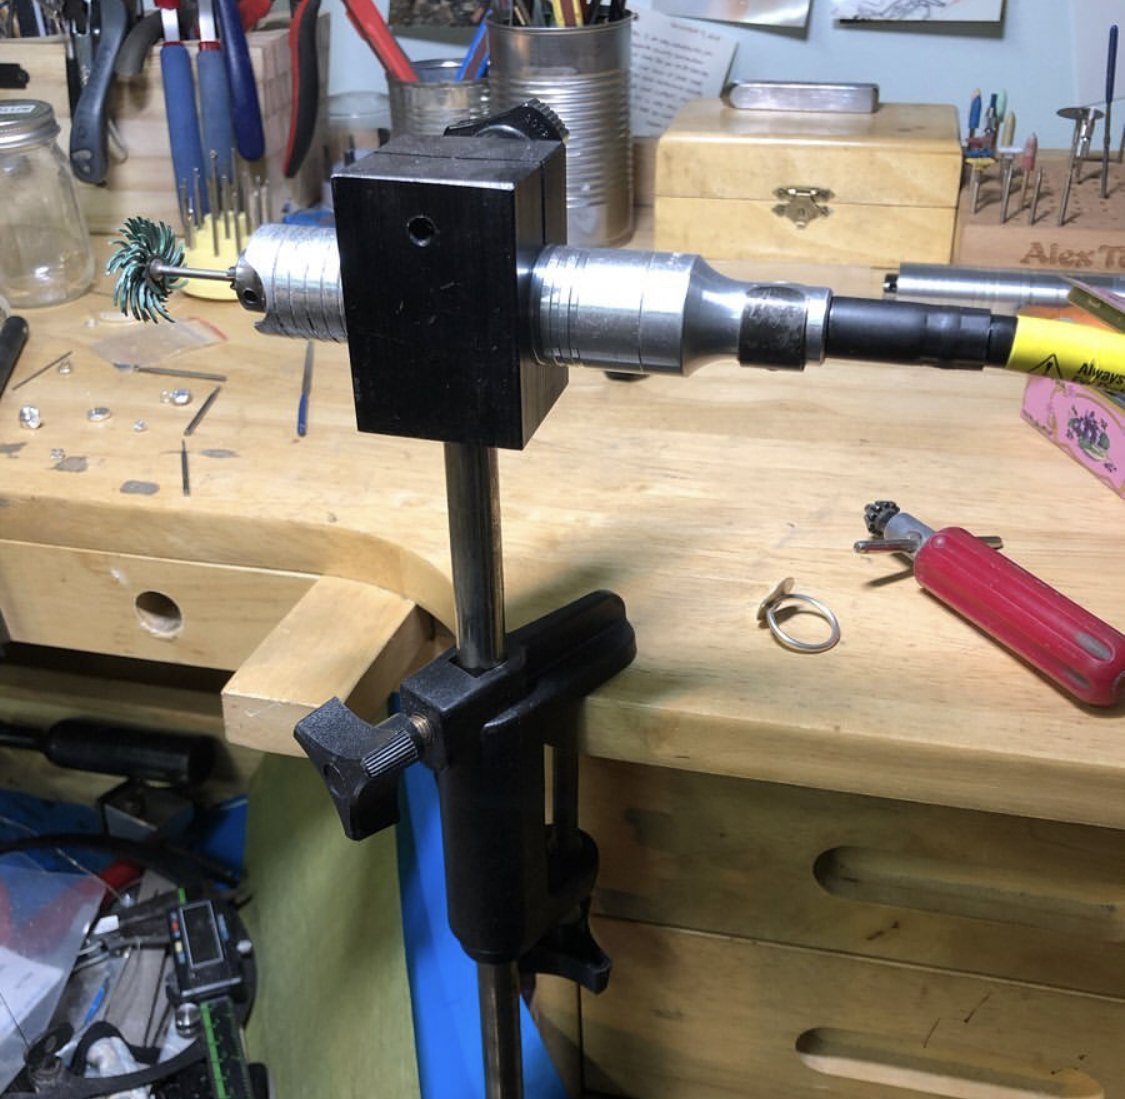
This is a tool that I’ve had for many years which I don’t use as much now that I have a polishing machine but if you are solely relying on your flexshaft for polishing it’s amazing because you can turn yours into a mini polishing machine!! You simply attach the clamp to your bench (the opening can accommodate no thicker than about 2.25” ) and slide your handpiece in ( it’s compatible with For use with Foredom H.30, H.30H, H.30SJ, H.43T, H.44A, H.44B, H.44T and H.44HT Handpieces) now you’ve got yourself a lathe! You can grind, deburr, carve, sand and polish your work but now you have the control of holding the piece with both hands. You can adjust the height to a comfortable standing position, which I love. The only downside is polishing can get a bit messy, always wear eye protection and a mask. Protect yo’ self! I love this thing. I used to use it a ton as a wax lathe.
You can purchase the holder here.
See the post here.
Joyce Chen Ultimate Scissors

When I need to trim bezel wire or a thin backplate, these are my go-to scissors for the job! I have also used them to cut bits of solder or other wires. They are extremely sharp! I found out while researching this post it is due to the carbon content in the steel, it is double or even triple the amount compared to normal stainless steel scissors. They are also formulated to be corrosion resistant! People use these scissors for cutting things like bones and branches 💪 They retail for about $21-$26 so I think they are a reasonable price for a long lasting, multipurpose scissor. I personally would not go thicker than 22g sheet when cutting with these! As someone who also does a lot of crafting and gardening these are just bomb scissors to have around!
You can purchase the scissors here.
See the post here.
Whaley Hand Vise

This simple hand vise created by Whaley Studios has a hole in the center so you can easily hold long wire or tubing. The handle has a flat side that not only allows you to firmly hold the hand vise against a flat surface, it also prevents it from rolling away. The grip is ergonomic and the chuck to loosen and tighten is easy to use. This is my go to tool if I want to coil a shorter piece of thick wire around a ring mandrel to make some stacking rings, or if I want to manually twist wire. It’s also great for straightening out a piece of wire. You can do this by attaching one end to your regular vise, and the other end to the Whaley hand vise and then give it a nice tug. This would also be great for holding wire and tubing while filing or polishing.
You can purchase the vise here from Otto Frei and use code MMS719X to save 5% off your purchase and support the page!
See the post here.
Japanese Rubber Finger Guards

Japanese Rubber Finger Guards from Otto Frei they are actually infused with bits of leather to add to their durability but still have the feel of rubber. My use for these has been to protect my fingers while sanding small objects. They fit well enough and aren’t bulky so that I can grip smaller objects. If I’m just sanding something for a second I wouldn’t bother with them but when I’m doing those marathon sanding sessions, these are a game changer. You could also use them to protect your fingers from coming into contact with patina or flux. Or when your fingers are gripping something repetitively these will make those jobs more comfortable. They come in different sizes I actually have the small and medium and I like the small for most of my fingers and the medium on my thumbs. I can’t speak to their longevity as I’ve only been using them a few months but they are pretty solid! Can’t imagine having to trade out my first two for awhile. They are sold in packs of ten for $6.95 so not a huge investment if you want to give them a go.
You can purchase the vise here from Otto Frei use code MMS719X to save 5% off your purchase and support the page!
See the post here.
SmoothSet Bezel Pusher
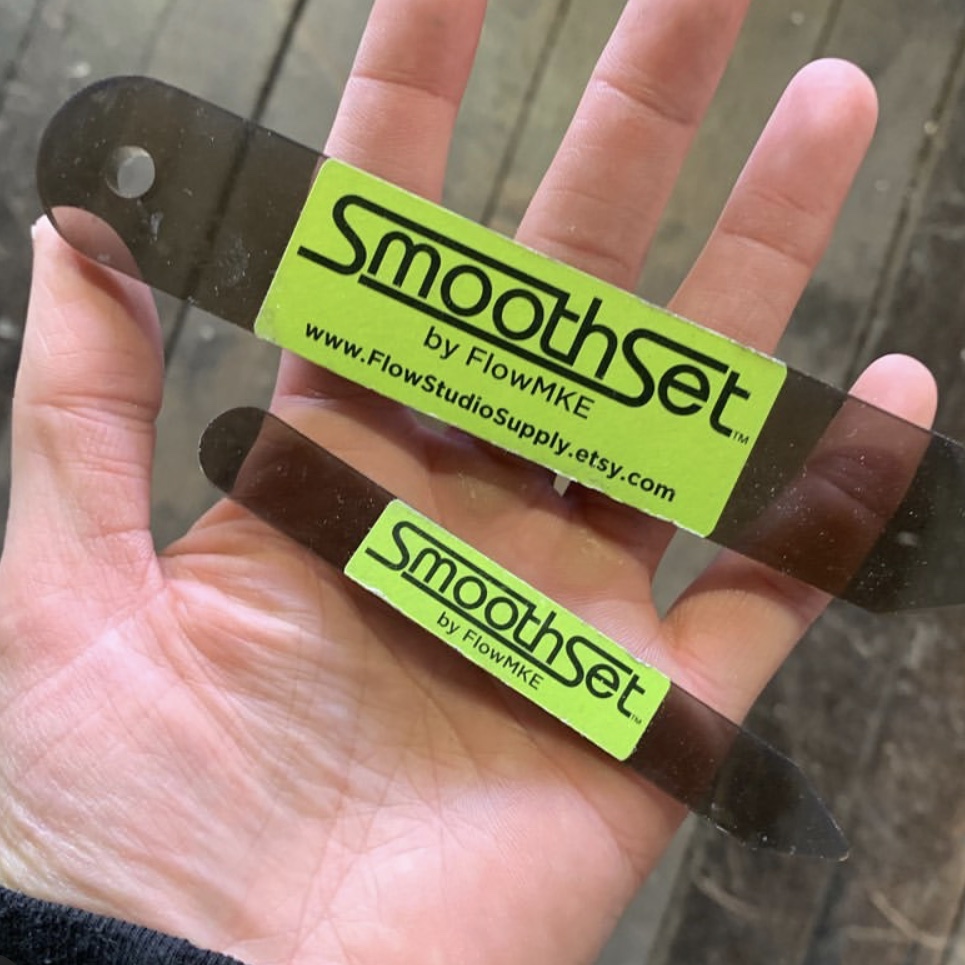
These acrylic bezel pushers created by Flow Studio Supply I’ve had these on my bench for many months now and wanted to share my experience! The premise of these acrylic pushers is that you can use them to set your bezels and they won’t scratch your stones! @flowmke2 was thoughtful about the design, they made two sizes, there is a pointy and curved end (in addition to the straight sides) and they have a bright label so you can easily spot on them on your bench! What I have found them the most useful for is shaping thicker gauges bezel wire around stones and the initially pushing down of a bezel!
You can purchase the bezel pushers here.
See the post here.
Hakko Fume Extractor System

One of my goals for 2019 is to have more conversations about improving our health in the studio. I realized that although this system is an investment, it was time to step my game up! This HAKKO unit is very light (7.5 pounds) which I like because it’s easy to move around. I have one duct but it does have the option of using two. It features three suction speeds and if you watch my videos you can get an idea of how loud they are, I like how quiet the loudest setting is, If I needed to speak over it or have it on for longer periods it doesn’t bother me! The best feature of this system is its HEPA filter (High Efficiency Particulate Air, is a designation used to describe filters that are able to trap 99.97 percent of particles that are 0.3 microns). It captures dangerous solder fumes (along with any other chemical, patina, white out etc. fumes) and actually RETURNS CLEAN PURIFIED AIR BACK INTO YOUR STUDIO 🙏🏻❤️
You can purchase the system here.
See the post here.
Thank you so much for tuning in every week for #tooltalktuesday! If you have a tool you would love to see covered please comment below, or let me know on Instagram! If you are looking for other tool recommendations please visit my #TOOLTALKTUESDAY page!

